How to Start a Profitable History Blog (for Hobby or Career)

If you have a passion for history, you should consider monetizing your knowledge and skills by creating content. If you look around, you will see people will less knowledge and ability than you making a huge impact simply because they were willing to record what they know.
One of the best ways to create content is to start a blog. Blogging not only gives you an outlet for your passion but it can make you a decent income. If you get fired or get sick so that you can’t work, you can always fall back on your blogging income.
Blogging is also quite convenient as a side-hustle for various reasons. These reasons make blogging a compelling option, especially for people who are new to content creation. (See Why blogging is the best side-hustle)
Starting a blog, however, can be tricky. Many new bloggers often make avoidable mistakes that cripple the growth of their blogs. However, if you do things the right way, blogging can open many opportunities for you.
In this article, I will give you all the information you need to start a blog the right way. This will give you best foundation for creating a successful and profitable history blog.
Here are some of the topics I will cover:
A quick note: If you want to go straight to the technical steps of starting a blog, you can check out my quick-start guide to setting up a WordPress blog.
1. What Is a History Blog?
A history blog is a blog where you share your passion and expertise about history. If you enjoy history, you can have a lot of fun sharing what you know.
There are several types of history blogs that you can start:
- A news blog. You can share that latest historical discoveries and news.
- A personal blog. You can give your personal opinions and ideas about various historical topics and discussions.
- A professional blog. If you are in a history career, you can share aspects of your work or results of any research you are conducting.
2. Who Should Start a History Blog?
While anyone can start a history blog and be successful, you will have an advantage in history blogging if:
- You have a passion for history. If you are always reading about history or watching history documentaries, you will have a unique perspective on what other people like you want.
- You study or teach history. If you are involved in academia as a teacher or a student, starting a blog can be a great way to solidify your learning.
- You have a history-related career. If you work in a history-related job, you can get a lot of content ideas from your work activities.
3. How Much Does It Cost to Start a History Blog?
Starting a history blog is surprisingly affordable and simple. If you want to start a professional blog, there are two main costs that you cannot avoid. These are:
- Web hosting. This will cost you roughly $60 for one year of hosting (or roughly $5 a month).
- A domain name. This will cost you about $15 a year.
Therefore, in total, you can expect to spend about $75 to start your blog.
Some web companies offers discounts and incentives that can bring down this cost even further. A company like ChemiCloud, for example, will give you a free domain as well as some hefty discounts for your first year (check for a discount).
As your blog grows and starts to make money, you can spend on other things like premium WordPress themes and plugins (see best plugins for a new blog) but for now, you can go with free themes and plugins.
4. Can You Make Money From a History Blog?
You can totally make decent money from a history blog. In fact, blogging about history can be an advantage because there are many niche topics that have low competition.
But how much can you make?
If you do things the right way, you should be able to make at least $1,000 dollars a month blogging part-time. According to blogger surveys, full-time bloggers make roughly $2,500 a month. Top bloggers are able to make over $200,000 a month (see examples here).
To get an idea of how to can estimate your potential earnings from blogging, I suggest you read my article on calculating blog earnings.
5. Why Start a History Blog?
Blogging in general has many advantages especially if you want to make money on the side by doing what you enjoy (see Why Blogging Is The Best Side Hustle).
If you love history, there are some specific benefits that should get you excited about starting your blog. For example, you can use your blog to:
- Share your passion for history. You have probably accumulated a lot of knowledge about history that other people would be excited to read about. Otherwise, you risk taking your knowledge to the grave.
- Make a side-income. Blogging is a particularly effective way to make money online by writing about things you enjoy. You can use this money to pay for a vacation, pay off debt, or give to charity.
- Build your profile as a history expert. If you have or want to get into a history-related career, you can use your blog to position yourself as an expert in whatever branch of history you specialize in. This can open opportunities career advancement and collaboration.
- Solidify your knowledge. If you are a history student or you just want a better grasp of history, writing things down help you to understand and remember better.
- Network with others. You can use your blog to connect with other history enthusiasts. This can lead to long-lasting friendships with people from all over the world.
- Market your business. If you have a history-related business (such as historical books publisher, course creator, or genealogical DNA testing services), you can use your blog to market your products and services.
6. Examples of Successful History Blogs
There are plenty of successful history blogs but in this section, I want to look at a few examples of blogs that are crushing it.
You can study these blogs to get an idea of how you can create and make money from your own history blog.
#1. Ancient Origins
Ancient Origins was founded by Dr John Syrigos and Joanna Gillan in 2013 and since then has grown into a huge enterprise with over 50 writers and 12,000+ published articles.
The blog is a treasure trove of information on a wide range of historical topics covering ancient traditions, artifacts, facts, myths and many more.
They have done a great job of monetizing their site through premium content subscription, courses, services (like DNA tests) and archaeological tours among others.
#2. Medievalists.net
Medievalists.net blog was founded by Peter Konieczny and Sandra Alvarez in 2007 and now have a team of experts that write for the site.
The blog focuses on mainly on medieval history and is a great example of a blog that has found success by niching down to the middle ages.
They monetize through donations (Patreon), courses, and they also have a podcast.
#3. Active History
Active History was started by Russel Tarr around 1998. Russel is a history teacher and currently the head of history at the International School of Toulouse.

The blog provides various resources to help in teaching history. These include simulations, quizzes, worksheets and mind games.
The blog is monetized mainly through membership subscriptions and sales of teaching resources (such as books).
#4. Tasting History
Tasting History is a blog started by Max Miller who has a popular YouTube channel by the same name. At the moment, the blog/website seems like more of a complement to the videos. He monetizes the blog through Patreon and selling merch.
I have it here an example of how you can combine YouTube and blogging. As a YouTuber, you will still need a blog to house your content as well as collect an email list or create a store to diversify your income from YouTube.
7. Steps in Starting a History Blog (10 Simple Steps)
Starting a history blog is not difficult. In fact, it should take you less than 30 minutes to do so even if you have never set up a blog before.
In this section, I will take you through the most important steps in starting your blog.
To keep this article short, I have skimmed over some of the technical parts. If you need more detail about the technical steps, check out my quick-start guide to setting up a WordPress blog.
Let’s dive in.
#Step 1: Choose a niche for your history blog
When starting your history blog, you might want to focus on a particular topic or aspect of history. This is your niche.
History can be very broad and there are many niches and sub-niches you can target. You are only limited by your imagination.
Here are some examples of niches you can focus on.
- Established history disciplines like Political History, Art History, Food History, and Music History.
- Biographies of historical figures like Winston Churchill, Nelson Mandela, and Thomas Edison.
- Historical eras like Prehistory, Medieval, Renaissance, and Classical.
- Histories of Countries and Cultures like American History, Roman History, and Islamic History.
- History-related careers like History Reporting, History Teaching, and History Writing.
When choosing a history niche, there are a couple of questions you need to ask yourself, for example:
- What do you enjoy? What kind of history would you enjoy researching and writing about? For example, if you love art, you might find it more fulfilling to focus on art history.
- Who is your potential audience?Who are you writing for? Is it history students, researchers, or the general public?
- What are your goals? You need to understand the main reasons why you want to start a history blog. Some common reasons include: to make money, to advance your career, to share your knowledge or to learn more about history.
- What problems can you solve for your audience? Identify common problems that your audience is likely to face and try to solve them. For example, a history teacher may want easy-to understand resources that they can use to teach.
- Which skills do you have? What knowledge, experience and skills do you already have in the field of history that you can leverage.For example, if you have taught history for 10 years, you can start a blog to produce history teaching resources.
- Who are your competitors? What are existing history blogs writing about. Ideally, you want to get into niches that already have an audience but are not too competitive.
#Step 2: Choose a name for your history blog
Your blog name is an important part of your blog’s brand. You therefore need to choose an appropriate name that will help your blog to grow.
Here are some tips that will help you to choose a blog name.
- Don’t infringe on other people’s trademarks. To avoid legal issues, don’t choose a name that is too similar to another blog, organization, or company.
- Choose a name that easy to remember. This will make it easier for people to find your blog online.
- You can choose a name related to your niche. For example, you can choose a blog name like tastinghistory.com if you are into food history.
- You can use your name. If you have a history-related career, you can use your own name as your blog name so that you can build up your personal brand and position yourself as an expert.
As you choose you choose your blog name, you can also design your logo. You don’t need to spend too much time on this. Use a tool like Visme’s logo maker which has plenty of logo templates you can use.
#Step 3: Choose a blogging platform
There are many blogging platforms you can go with including ‘free’ blogging platforms. However, if you want to make money from your blog or turn it into a business, you need to go with a platform that will not hold you back.
Free platforms often lack crucial features that you need to upgrade to paid plans to get. They also have many restrictions that may limit your ability to monetize your site.
The best blogging platform for your history blog
I would recommend using a self-hosted platform like (WordPress.org not WordPress.com). Here are the benefits of using WordPress.
- It is the most popular blogging platform. It powers over 40% of all websites online.
- It is free. You don’t need to pay to use it and most web hosting companies allow you to install it with one click.
- It is open-source. The advantage of this is that you will not wake up one day to find that someone has deleted your blog or your blogging platform has gone bust.
- It is flexible. You can customize WordPress to your liking. For example,you can add a forum, shop, or membership site to your blog.
- Learning resources are plenty. WordPress has plenty of free and paid learning resources that you can take advantage of.
I will explain how to install and customize WordPress in #Step 6.
#Step 4: Choose a web hosting company for your history blog
Choosing a web hosting company is a crucial step when starting your blog because web hosting affects all kinds factors such as page loading speed, website security and uptime.
As much as there are some good web hosting companies out there, there also some terrible ones. You need do your research well otherwise you could end up with a slow blog that is easily hacked.
This will hamper your blog’s growth since search engines like Google throttle traffic to sites that don’t offer a good user experience.
Here are things you need to do before you choose a web hosting company.
- Check for customer reviews. You can do this on sites like TrustPilot and Host Advice.
- Check for amount of resources allocated. Pay attention to amounts of RAM, bandwidth, Inodes, and Disk Space allocated.
- Check for incentives and freebies. These include free domains, free backup, money-back guarantees, and more.
My recommended web hosting company
I would recommend going with a web hosting company like ChemiCloud. It is one of the best web hosts especially for shared hosting. Here are some of the reasons why.
- The are highly rated. The last time I checked they had really good customer ratings (5 Starts on HostAdvice and 4.9 Stars on Trustpilot). Most reviewers comment on their excellent customer service.
- They are competitively priced. Their web hosting plans start at less than $3 a month. They also give hefty discounts (over 70% less) from time to time (Check for current prices and discounts).
- They provide a free domain. This means you can save about $15 that you would have used to pay for a domain.
- They have standout features. Their features are optimized to making your blog fast which is great for SEO. Such features include 30GB NVME SSD drives, 350,000 inodes, and Litespeed Caching.
- They have plenty of freebies and incentives such as a free SSL certificate, free backups, free website migration, free CDN, and a 45-day money-back guarantee.
- They are easy to use. They have cPanel which makes it easy to manage your blog even if you are a complete beginner.
You can explore more ChemiCloud features here.
Besides ChemiCloud, there are a couple of other good web hosting providers you can explore. These include Hostinger, A2 Hosting, Green Geeks, Host Armada, Fastcomet and Bluehost.
In this tutorial, I will show you how to start your blog on ChemiCloud. If you want to start your blog on another provider, the steps are relatively similar as long as it is a shared hosting provider that uses cPanel.
For this tutorial, I will show you how to set up your blog using ChemiCloud but the steps would be relatively similar for any other provider that uses shared hosting and cPanel.
Save Big On Web Hosting


Save Up to 70% by Hosting with ChemiCloud
#Step 5: Register your domain name and sign up for hosting
Once you have chosen the web hosting company you want to use, you can now sign up and purchase a hosting plan. This process is quite straightforward and on ChemiCloud it should take you less than 10 minutes.
Here are the main steps you will follow.
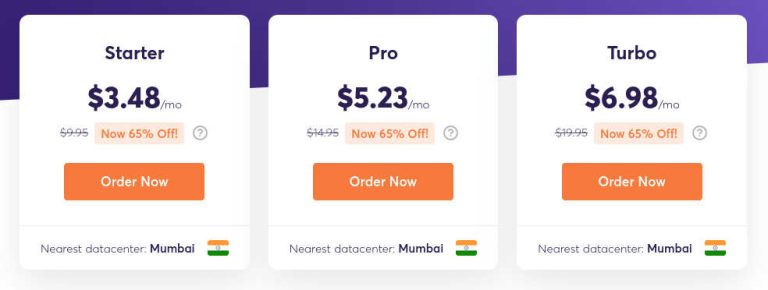
- Choose your preferred web hosting package. With ChemiCloud, you can choose between three hosting packages (Starter, Pro, and Turbo). I would recommend going with the Pro package for general blogging since this allows you to host multiple domains.
- Register your domain name. The process begins by searching to find out if your preferred domain name is available for use. If it is, then register it. If not, you need to choose another domain name and search again. Registering a domain name costs about $15 a year but with ChemiCloud, you get a free domain.
- Fill in your account details. You will then need to fill in your personal details such as your name, contact details, and payment method. This information will facilitate the purchase of your hosting plan. Ensure you give the right email address as this will be used to send your receipt and login details.
- Choose a data center. You should choose a data center near where the majority of your expected visitors will come from. This will ensure a faster user experience for your visitors.
- Select extras. A great extra to choose is the domain privacy protection. This keeps your private information from being publicly displayed in the Whois data registry. When your information is public, you will receive a lot of spam emails and calls.
- Complete the purchase. Once you have filled everything, go ahead and make the purchase. all the options are filled, you can make a purchase. If you can, choose a longer hosting period because this will allow you to lock-in the promotional discounts for a longer period. ChemiCloud allows you to purchase hosting for up to 3 years.
#Step 6: Install and configure WordPress
Once you compete the purchase process, the web hosting company will send you a receipt and login details via the email you provided.
The next step is to install WordPress. If you chose ChemiCloud (or any host with cPanel) as your preferred package, then this process will take a few clicks.
First, log in to your web hosting provider and navigate to the cPanel. From here, look for the softaculous installer and use this to install WordPress.
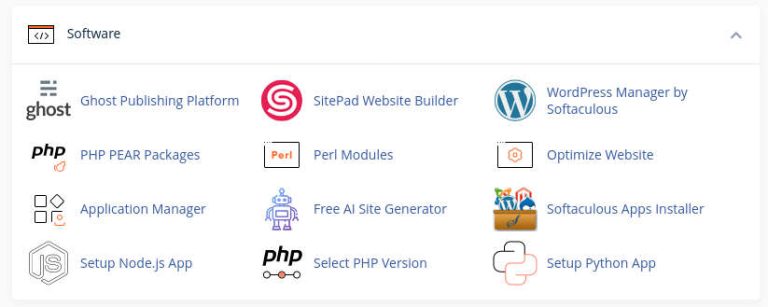
Once you install WordPress, you then need to configure it. Here are some common WordPress configurations you can do.
- Install an SSL certificate. You can use the free Let’s Encrypt SSL.
- Update the WordPress core if necessary.
- Delete any plugins that you won’t need (such as Hello Dolly).
- Set a permalink structure. I would suggest using the ‘post name’ option.
If you want more information on how to configure WordPress, check out this YouTube video.
#Step 7: Install WordPress plugins
WordPress plugins add-ons that you can install to increase the functionality of your blog. You can use plugins for design, security hardening, and enhancing speed among other uses.
When installing plugins, don’t install too many plugins otherwise your blog will be slow and vulnerable to hacking.
If you need guidance on which plugins to install, check out my article on The Best Plugins for a New Blog.
However, for a start, here are the most important plugins you need.
- A speed optimization plugin such as WP Rocket (a paid plugin). You can use this to improve your blog’s page loading speed.
- A backup plugin such as WPVivid (a free plugin). You can use this to make backups of your blog.
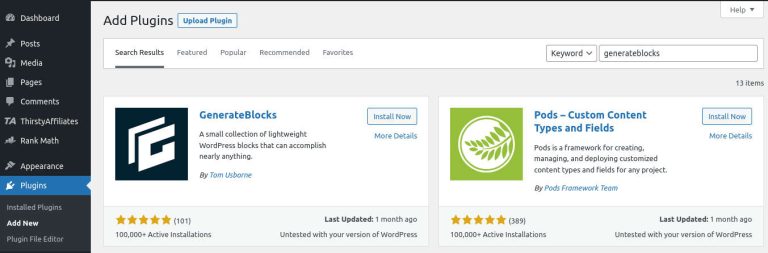
- A design plugin such as GenerateBlocks (a free plugin). You can use this together with a theme (such as GeneratePress) to design your blog.
To add a WordPress plugin, go to your WordPress dashboard, navigate to ‘Plugins’ and then click ‘Add New’
#Step 8: Design your blog
After you have finished installing WordPress and plugins, you can now design a blog. To design a WordPress blog, you will need to install a theme and a design plugin.
To install a theme, go to the WordPress dashboard and click ‘Appearance’ then ‘Themes’ then ‘Add New’. From here, you can search for hundreds of themes in the WordPress repository.
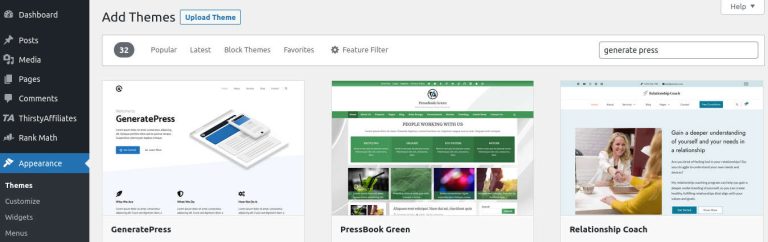
A good theme you can try is the GeneratePress theme. It is light, secure, and fast which makes it great for SEO.
The premium version of GeneratePress costs around $59 a year (check current price) but they also have a free theme that you can use if you don’t have the budget for a paid theme.
There are many tutorials on YouTube (such as this one) that will show you how to design your blog using GeneratePress.
#Step 9: Create important blog pages
You can create blog pages to display information that does not change often. Below are some of the common blog pages you can create.
- Homepage. This page acts as the hub for all our blog content as is often the page people land on when they search your domain name.
- Blog page. You use this page to display all your blog posts. The blog posts will often appear in the order that they were published.
- About page. This page provides information about you, your blog, or your business (if it is a business blog).
- Legal pages. These are pages such as the privacy policy, terms, and disclaimer pages. They provide information about the conditions for using your blog as well as how you collect and use personal information.
To create a blog page, go to your WordPress dashboard, navigate to ‘Pages’, and then click ‘Add New’.

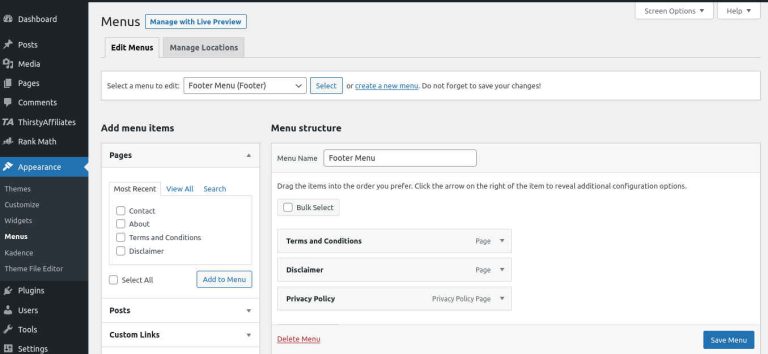
Once you have your pages, you need to create a menu so that your visitors can easily navigate your blog. To do this, go to the WordPress dashboard and ‘Appearance’ and then ‘Menus’.
# Step 10: Create your blog posts
Blog posts are the bread and butter of blogging and most of the content you create on your blog will be in the form of blog posts.
Blog posts differ from blog pages in that they have additional features such as author names, dates, comments, and categories.
To create a blog post, go to the WordPress dashboard, navigate to ‘Posts’, and then click ‘Add New’.

Quick note: If you got to step 10, congratulations, you should now have a functioning blog. If you got stuck at any of the steps, you can check out my quick-start guide on starting a blog for more detailed steps.
8. What to Write About In A History Blog (History Blog Topic Ideas)
After you have created your blog, you now need to write your posts. Coming up with blog post ideas can be challenging especially if you are new to blogging.
Here are a few ways you can get blog post ideas.
- Use a Keyword tool (such as KW Finder) to identify low-competition keywords that you can rank for.
- Snoop on other blogs in your niche. Look at what kind of topics and keywords they are targeting.
- Use your personal experience. What would you like to read about that is not being covered elsewhere?
- You can research online by looking at popular social media sites, Q&A sites as well as video sites like YouTube.
Once you have your blog post ideas, you are now ready to start writing. But first, you have to decide on what type of blog post you want to write.
Here are some common types of blog posts you can write.
- Lists. You can use list posts to summarize information. For example: 12 Reasons why the roman empire collapsed.
- Q and A posts. Use these posts to give answers to people’s questions. For example: How often did people bathe in the medieval times?
- How-to/Tutorial posts. Use these posts to provide step-by-step instructions on how to do something. For example: How to build a family tree to trace your ancestors.
- Reviews. You can review history-related products and services such as books and travel destinations. For example, A review of guns, steel and germs by Jared Diamond.
- Personal stories and anecdotes. Use these types of posts to share your personal opinions, ideas, or experiences. For example: My first impressions of the Taj Mahal.
- News posts. Write news posts to update readers on what is happening in the world of history. For example: 4,500-Year-Old Lost Ancient Palace Unearthed in Iraq
- Round up posts. These are also known as ‘best-of posts’. For example: Best historical sites to visit in 2024.
9. How to Get Visitors to Your History Blog
After you have written and published your posts, you need to get visitors to read them. This will probably be the biggest challenge in your blogging journey.
However, if you implement the right strategies, you should start to see visitors streaming in.
Here are some quick tips to get visitors to your blog.
- Write blog posts that are optimized for SEO. This will help you to get traffic from search engines like Google. You can improve your on-page SEO by placing your target keyword in your blog title, URL, and sub-headings.
- Target keywords you can easily rank for. If your blog is new, it will be difficult to rank on search engines if you choose keywords that are too competitive. Use a keyword tool like KW Finder to identify keywords with low competition.
- Promote your blog posts on social media. You can share your posts on platforms like Facebook, X, Instagram and Pinterest. You can also create YouTube and TikTok to drive visitors back to your blog.
- Create an email list. You can collect email addresses from your visitors so that you can keep communicating with them after they leave your blog. You can use a service like Systeme.io for this. The important thing here it to give them a compelling reason to sign up to your email list.
- Link to other posts in your blog.You can interlink your blog posts to make it easy for your visitors to find other relevant posts on your blog. If done well, once visitor can visitor two or three blog posts, thereby increasing your pageviews.
These are just a few of the ways that you can promote your blog but they are enough to get you started.
10. How To Make Money From Your History Blog
Making money from your history blog is not complicated as long as you have readers who love what you are writing. However, you need to be strategic in how you choose to monetize.
Here are some quick tips that will help you to maximize the amount of money you can make from your blog.
- Have enough content. Have at least 100 blog posts that are well optimized for SEO.
- Increase your conversion rate. You can do this by improving your copywriting techniques.
- Diversify your monetization. Target more than one method of making money.
In this section, I will give you some easy ways that you can start to make money from your history blog.
#1. Display Ads
This is an easy way to make money from your blog. To get started, you sign up for a display ad network like AdSense, Ezoic, or Mediavine.
Once they accept you into your program, they will add display ads to your blog and pay you every month. However, you will need to fulfill certain requirements for you to get accepted.
To increase your chances of getting accepted, try and have at least 30 blog posts that are bringing in some traffic. This should get you into Adsense or Ezoic.
#2. Affiliate Marketing
In affiliate marketing, you earn a commission when people purchase a product or service through your affiliate link. This is a great way to make money because you get to recommend products or services that you regularly use or trust.
Some products and services you can promote include history books, DVDs, documentaries, history kits, ancestry tracing services, and history courses.
It doesn’t take a lot of effort to get started with affiliate marketing. All you need to do is to sign up for a company’s affiliate program or join an affiliate network. Once you get accepted, you can start promoting their products or services.
Some good affiliate networks for history blogs include: Amazon Associates, The History List, History Unboxed, Ancestry.com, and Udemy.
#3. Sell Digital Products
Selling digital products like ebooks, worksheets, stickers, or posters is an easy way to start selling on your blog. While this may seem intimidating at first, there are plenty of tools available that make the process a breeze.
For example, you can use a platform like Payhip that take cares of all the technicalities involved in delivering your digital product. The great thing about them is that they have a free tier where you only pay when you make a sale.
If you want to try Payhip, you can use my discount code (HOBBY10) for a discount on the paid plans.
11. Quick Tips and Advice For Creating a Successful History Blog
Many new bloggers get frustrated with blogging because they expect it to be easy. Blogging is not a walk in the park neither is it a get rich-quick-path.
With that said, if you get the fundamentals right, you should be able to build a successful and profitable blog in no time.
Here are some quick tips to help you get started.
- Ensure your blog is technically sound. Your blog needs to be fast, secure and SEO-friendly. This will make it easier to get traffic from Google and other search engines. You can achieve this by getting the best web hosting company you can afford and by getting a good theme.
- Meet your audience’s needs. You have to understand what your audience needs and give it to them as efficiently as possible. Don’t hide answers behind walls of text.
- Take advantage of blogging tools. There are plenty of excellent blogging tools that can make your blogging much easier. For example,AI writers like Writesonic or ChatGPT can help you develop ideas and come up with decent first drafts.
- Write blog posts that are easy to read. Use a writing style that is friendly and easy to read. Also format your post using images and bullet points to break up walls of text. Finally, use grammar-checkers like Grammarly to identify grammar mistakes.
- Blog consistently. Set aside one or two hours a day to blog. At this rate, you should be able to produce 1-3 blog posts every week. This means you will have a minimum of 100 blog posts a year.
- Have a long-term view. It can take anywhere between 1 and 3 years before you start to see significant results depending on how consistent you are. Don’t get discouraged if you don’t get the results you expect in a few months.
I have plenty of more tips in my article on 100+ blogging tips for beginners. Check out the article if you need a summary of everything you need to be successful in blogging.
Wrapping Up
Hopefully, you now have an idea of what you need to start a successful history blog.
As I have said before, success in blogging takes and the quicker you start the better. If, for example, you had started your blog 3 years ago, today you would be reaping the rewards. While 3 years may seem like a long time, it actually isn’t. It will pass in a flash.
So, don’t procrastinate. Start your blog and learn as much as possible about what it takes to grow a successful blog. Also, don’t forget to have fun. If you love history, this should not be too difficult.
Further Reading
Here are some articles that will help you out as you start your blogging journey.