Set Up a WordPress Blog On ChemiCloud (Quickstart Guide)
Starting a blog is a great way to share your passions, hobbies, and interests while making an income on the side. It is also a great way to express your creativity or promote your business.
Although starting a blog can seem like a daunting task, it is a fairly straightforward process if you know what to do. Even if you are a tech novice, you should be able to set up a blog in less than 30 minutes.
In this guide, I will take you step-by-step through the entire process of setting up your WordPress blog from signing up for hosting to writing your first post. I will be using ChemiCloud for web hosting services in this tutorial.
Steps In Starting a Blog or Website
#Step 1: Choose Your Hosting Provider
Choosing the best web hosting provider for your budget will ensure that you give your blog the best foundation. In this tutorial, we shall use ChemiCloud, which is one of the best web hosting providers for new blogs or websites
Save Big On Web Hosting


Save Up to 70% by Hosting with ChemiCloud
ChemiCloud is a privately owned American web hosting company that was started in 2016. Since then, have built a reputation for fast, affordable, and reliable hosting services. They currently host over 80,000 websites.
Here are some of the standout ChemiCloud features
You can check out more ChemiCloud features here.
#Step 2: Sign Up for Hosting and a Domain Name
a) Select Hosting Your Package
If this is a new blog and you don’t expect a lot of traffic, then shared hosting will be appropriate.
ChemiCloud have three shared hosting packages (Starter, Pro and Turbo).
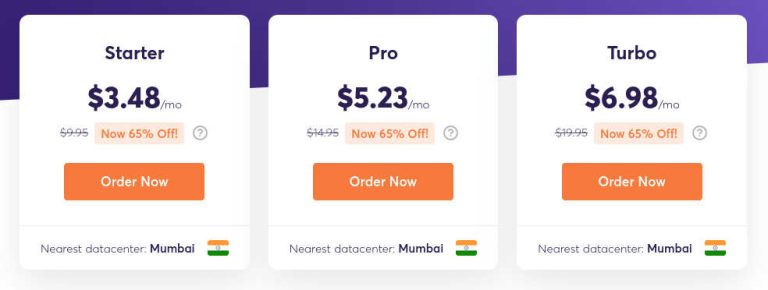
- Starter. This is the cheapest plan, but you can only host one website.
- Pro. This plan has more resources, and you can host multiple websites.
- Turbo. This is the most powerful package but also the most expensive.
How do you choose between them?
- My first choice would be Pro because it allows you to host multiple websites. This gives you the flexibility to experiment with different blogs.
- If you are cash-strapped and you only need one blog, then go with Starter.
- If you want powerful features because you expect your blog to grow quickly, or you need extra features like an online store or membership site, then go with Turbo.
b) Register Your Domain Name
Once you click ‘Order Now’ on your preferred package, you will be taken to a page where you can register your domain name.
Under ‘ Register a new domain‘, type in your preferred domain name and then click ‘ Check’, to see if it is available for purchase.
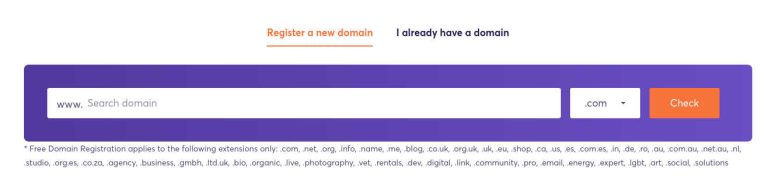
Many popular or short domain names are often taken, so keep trying until you find an available domain.
If you already have a domain name from elsewhere, click on the ‘I already have a domain’ tab and put in the domain name.
c) Choose Your Billing Cycle
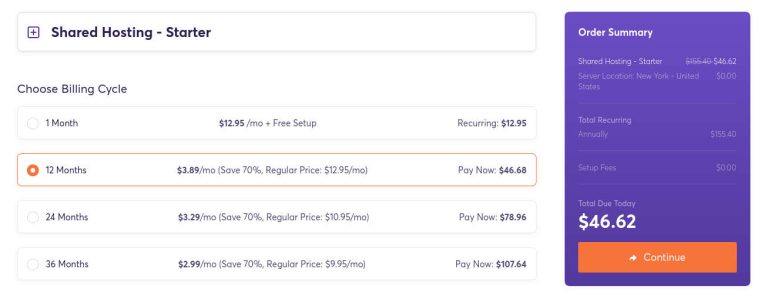
After choosing your domain name, you need to choose the hosting period (billing cycle).
You can choose to host for a month, one year (12 months), two years (24 months), or three years (36 months).
Note that the discounted prices will end once your current hosting period ends, and when you renew, you will be re-billed at the regular non-discounted price. And this can be a big jump in price, especially if you received a big discount.
Therefore, you want to lock in the discounts for as long as possible. ChemiCloud allows you to buy hosting at a discounted price for up to 36 months (3 years). In fact, you get an even larger discount if you choose a longer hosting period.
My advice would be to choose a hosting period of at least a year, and if you can afford it, go for the 3-year option.
d) Enter a Promo Code and Choose the Server Location
If you have a promotional code, you can enter it in this section.
You will then need to choose your server location. Choose a server location closest to where you think you will receive most of your visitors. This will ensure that they get the fastest server speeds.
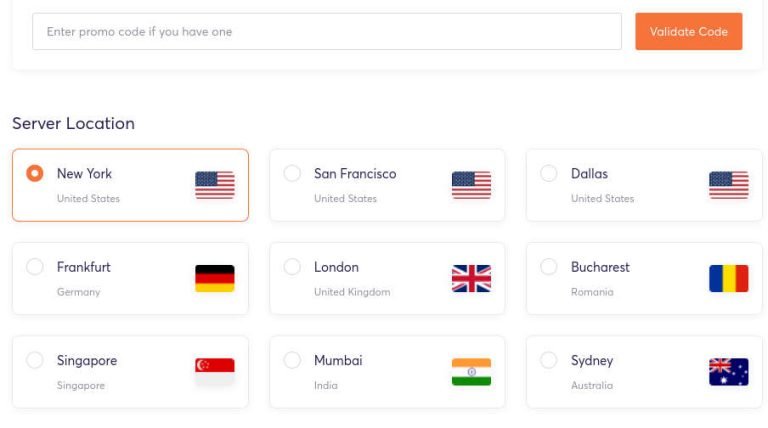
For example, if you suspect that most of your visitors will come from the east coast of the US, choose the New York server.
ChemiCloud also offers the following add-ons.
- Protect your site with SSL.
- SpamExperts Email Security.
- Marketgoo SEO Tools.
You don’t need these because there are better options. Go with the default option ‘None’ for all of them.
Some alternatives to add-ons that ChemiCloud offer include:
- For SSL, you can install Let’s Encrypt SSL for free from your cPanel.
- For SEO, you can go KWFinder, which is affordable and has plenty of SEO features (check KWFinder prices).
- For email, you can go with a Zoho business email that will allow you to have a domain-branded email like contact@hobbyslave.com.
e) Add Domain Privacy Protection
Add domain privacy protection. This is essential. This hides your private information (such as email and home address) from the Whois record directory. Anyone can access the Whois directory.
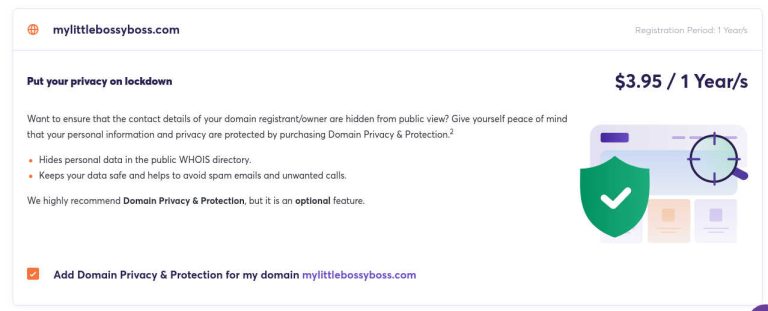
If you don’t do this, you will receive lots of spam calls, emails, and letters selling you all kinds of services. Privacy protection is quite cheap, and it will save you a lot of headaches.
f) Fill in Your Account Information
In this section, you will need to fill in your account information.
Here is the information you will be required to fill in:
- Your personal information (first name, last name, email, and phone number). Fill in the correct information because the contact details you provide will be used to contact you.
- Your billing address (street address, city, postcode, country).
- Your account security (your password and security question). You will use this password when you log into your ChemiCloud account.

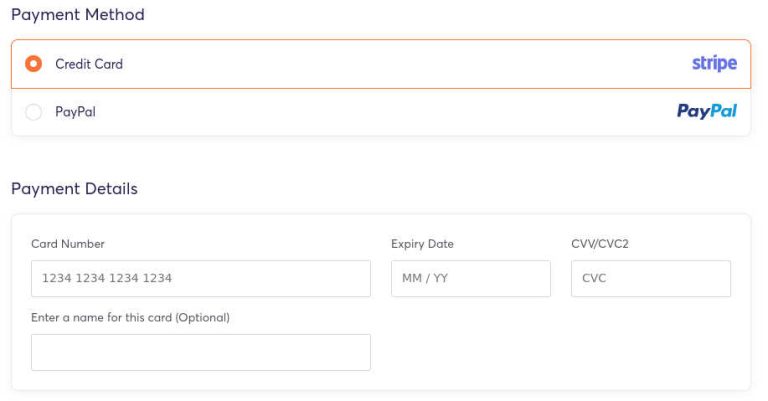
g) Select Payment Method and Check Out
You then need to select your payment method. ChemiCloud has two options (credit card and Paypal).
Fill in your payment detail, accept the terms, and check out.
Once you have completed the signup process, ChemiCloud will send you several emails through the email address you provided.
These welcome emails will have useful information such as:
- Your receipt and billing cycle (including your next due date).
- Your login details.
- A link to the login page.
- Your server information (including your nameservers). If you did not buy your domain name from ChemiCloud, you will need the nameservers to connect your domain name to your hosting account).
Keep these welcome emails where you can easily access them.
If you encounter problems during the signup process, ChemiCloud have a chatbot that you can use to get instant access to someone to help you. They respond pretty fast.
#Step 3: Install and Configure WordPress
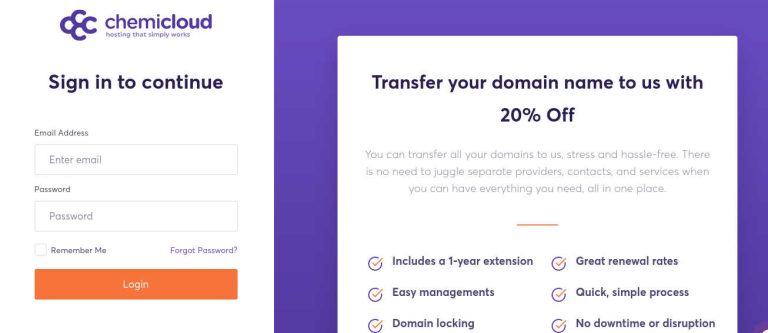
To install WordPress, you will need to log into your ChemiCloud account. You can use the link provided in your welcome email. Alternatively, you can go to the ChemiCloud website, and on the homepage navigation, there is a red login button.
When you click the button, you will be taken to a login page (see below). Use the email address and password that you provided when signing up.
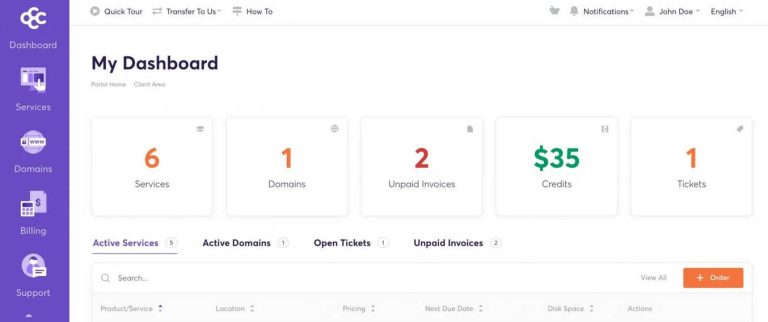
Once you log in, you will be taken to a client area where you can see your account details.
a) Install WordPress
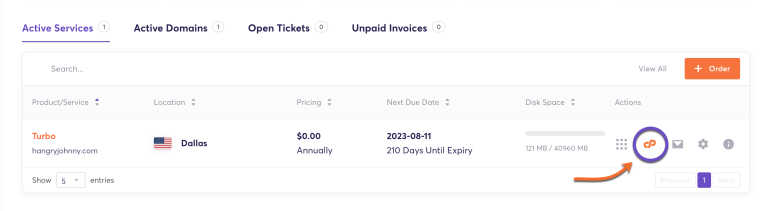
To install WordPress, navigate to the cPanel from your dashboard (under active services). cPanel may require you to put in your password again.
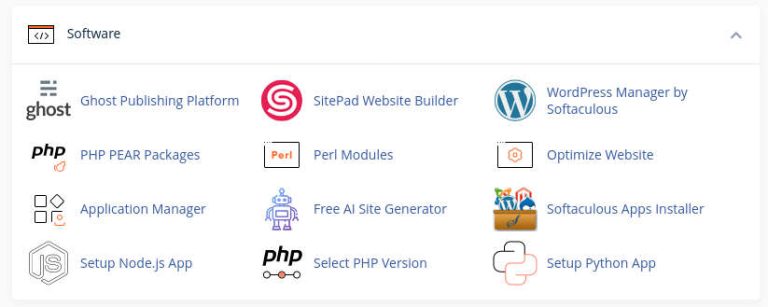
Once in the cPanel, scroll down to the software section and click on WordPress Manager by Softaculous.
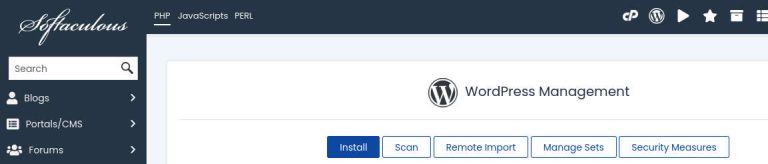
This will take you to the WordPress Management tab on Softaculous. Click on the Install button.
Once the installer is running, you will be required to choose:
- The WordPress version. Install the latest version.
- Your installation destination. This is the URL (domain name) you want to install WordPress on.
- The directory where you want to install WordPress. It is best to have this blank so that WordPress is installed in the root directory. This will enable you to log in from yourdomain.com/wp-admin
- Your site name and site description. Fill in your blog’s name and what it is about.
- Your username and password. You will use this username and password every time you want to log into your WordPress site. Ensure that you have a strong password and choose a username that is hard to guess. Also, keep these somewhere safe.
- Your admin email. WordPress will use this email to communicate any information about your site.
Once your WordPress installation is complete, you can log into your WordPress dashboard by typing your website address into your browser with /wp-admin added to the end of it. For example yourdomain.com/wp-admin
This will take you to the WordPress login page.
You can also log in through your WordPress manager (i.e. cPanel then WordPress Manager by Softacoulous).
b) Configure WordPress
Once you have installed WordPress, you need to do some basic WordPress maintenance and configurations such as:
- Deleting pre-installed themes and plugins that you don’t need.
- Installing any updates that need updating.
- You can set a nickname to display publicly on your posts (under the users’ tab).
- Setting the Permalinks to Post name (under Settings then Permalinks tab).
Check out this short video on how to configure WordPress (7 minutes).
c) Install an SSL certificate
An SSL certificate is important because it secures your visitors’ data by encrypting it. It also helps with rankings on Google.
If you don’t install an SSL certificate, browsers will send warnings to your visitors that your site is unsafe.
Fortunately, with ChemiCloud, you can install an SSL certificate for free using Let’s Encrypt SSL.
From the cPanel, scroll down to the ‘Security’ section and then click on ‘Let’s Encrypt SSL’.
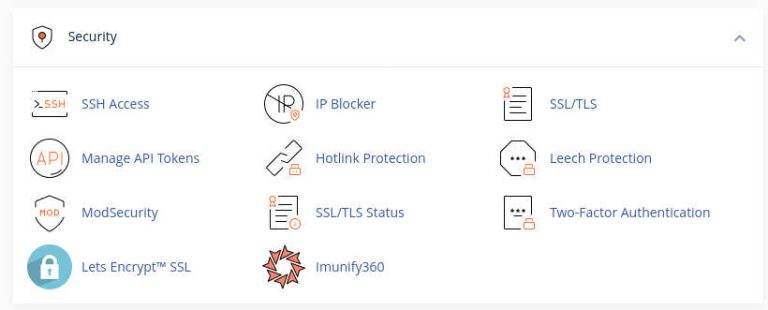
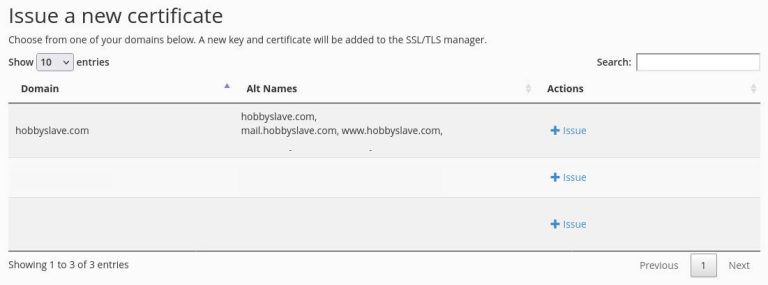
When you click on Lets Encrypt SSL, it will take you to a window where you can issue an SSL certificate.
#Step 4: Install a Theme and Design Your Site
In the past, you had to hire a web designer to design your blog for you and this would cost on average between $1,000 and $5,000. These days, for under $100 you can design your site yourself and make it look really good using a WordPress theme and a blocks plugin.
WordPress comes already pre-installed with some free themes that you can use, but there are better themes out there.
A good theme you can consider is the GeneratePress theme. They have a paid and free theme.
The paid theme costs around $59 a year (check the current price) and is packed with useful features.
Why use the GeneratePress theme?
GeneratePress is one of the most popular themes (with over 4.5 million downloads). It is light, fast, and versatile. It is also quite affordable.
Here are some stand-out features of GeneratePress.
- A theme builder. This will help you create any kind of design you want such as a landing page, sales page, or e-commerce store.
- Site library. Here, you will find a collection of pre-made website templates that will speed up your design process.
- WooCommerce Integration. This is important if you want to create an e-commerce site.
To add even more functionality to the GeneratePress theme, you should use it together with the GenerateBlocks plugin (also made by the GeneratePress team). GenerateBlocks plugin adds custom functions to the native Gutenberg blocks on WordPress.
The paid plugin starts at around $39 a year (check the current price). They also have a free plugin.
How do you decide when to use the free or paid theme or plugin?
- If you are a general blogger who wants a beautiful, customizable site, go with the GeneratePress premium ($59) and the free GenerateBlocks. This will be sufficient for most customizations.
- If you want maximum customizability, use the GeneratePress Premium theme and GenerateBlocks Pro. Together, they should cost less than $100 a year. Choose this option if you are into web design, digital marketing, or e-commerce.
- If you are strapped for cash and just need a barebones blog without much customization, go with the free GeneratePress theme and free GenerateBlocks.
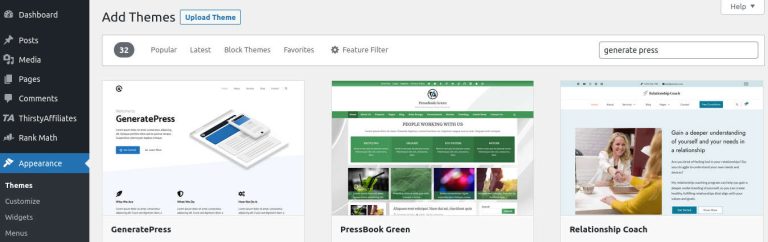
To install a free WordPress theme, go to your WordPress dashboard, ‘Appearance’ then ‘Themes’ then ‘Add New’. From here, you can search for any free theme on the WordPress repository. If you want the free GeneratePress theme, search for it in the search bar and then click ‘Install’ and then ‘Activate’.
To install a paid WordPress theme such as the GeneratePress Premium theme, go to the GeneratePress theme website and purchase the theme. They will give you a link to download the theme as a zip file.
Then go to Go to your WordPress admin dashboard then click ‘Appearance’, then ‘Themes’ then ‘Add New’ then ‘Upload’.
Navigate to the folder where you have saved the zip file and click upload. You will need to install your license key and then activate it.
If you go on YouTube, you will find many tutorials that will show you how to design your blog using GeneratePress and GenerateBlocks. For example, you can check out this tutorial.
#Step 5: lnstall WordPress Plugins
WordPress plugins help you to add functionality to your site. For example, you can:
- Add e-commerce features like stores and membership sites.
- Add security features like login limits and hardening.
- Speed up your site.
- Add visitor tracking such as Google Analytics.
To add any free plugin (such as GenerateBlocks), go to your WordPress dashboard and navigate to ‘Plugins’ then ‘Add New’.
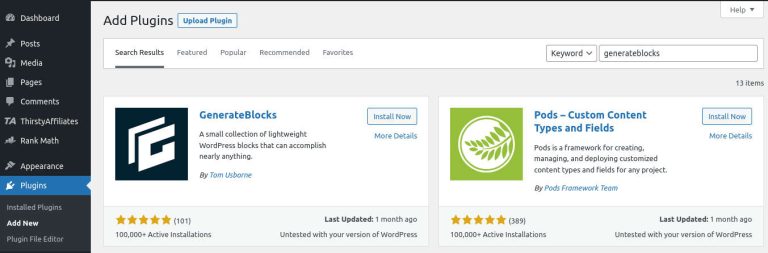
You can search for free plugins in the WordPress repository using the search bar. Once you find a plugin you like, click ‘Install’ and ‘Activate’.
If you want to purchase a plugin, go to the vendor’s website, purchase the plugin then download it as a zip file. Then go to your WordPress dashboard and click ‘Plugins’ then ‘Add New’. Then click ‘Upload Plugin’ and browse to the folder where you have saved the zipped plugin that you have purchased.
You will need to install your license key and then activate it.
Having too many plugins can slow down your site and lead to security issues, so it is best to start with a few and add new ones only when needed.
You can get free versions of the most essential plugins, although you get more functionalities and support if you go with a paid plugin.
Here are some great plugins you can start with on a new site.
- SiteGuarding (paid). This is a security plugin that protects your site from hacking and malware infection. You can also remove any malware if your site gets infected. Check out SiteGuarding here.
- WP Rocket (paid). This is a must-have plugin if you want to speed up your site. A slow blog can cost you visitors and rankings in Google. WP Rocket is cheap and easy to use. Check out WP Rocket here.
- Imagify (free and paid). This is an important plugin for reducing the size of your images automatically. Large images are a big cause of slow websites. Check out Imagify here.
- WP Vivid (free). This is a backup plugin and you can also use it for staging and migrating sites. You need to have a backup in case something goes wrong with your site. Always have your own backups for your site. Check out WP Vivid here.
- Payhip (free and paid). If you intend to sell any digital downloads on your site, Payhip will do all the heavy lifting for you (Check out Payhip here). You can get a 10% discount on the paid plans if you use the code HOBBY10.
For a deep dive into the most important WordPress plugins that you should install in your blog, check out my article on the must-have plugins for a new blog.
#Step 6: Create Essential Pages
With a WordPress blog, you have the option of creating either Pages or Posts.
A page is used for content that does not change very often. Here are the important pages you need to create:
- Homepage. This serves as a hub for your content and introduces your blog.
- About page. This tells your visitors more about you.
- Blog page. This is where your visitors can find all your blog posts.
- Legal pages (privacy policy, terms, and disclaimer). These tell your visitors about what kind of data you collect and the terms of using your blog. You will need to have the legal pages in place if you want to apply to an affiliate program or a display Ads network like Ezoic or Adsense.
To create a page, go to your WordPress dashboard then navigate to ‘Pages’, then ‘Add New’.

#Step 7: Create a Navigation Menu
To access your important pages, you need to create a navigation menu. Usually, the menu appears at the top of your website, but you can also have it at the footer.
You can add pages to your menu by going to your WordPress dashboard and selecting ‘Appearance’ then ‘Menus’.
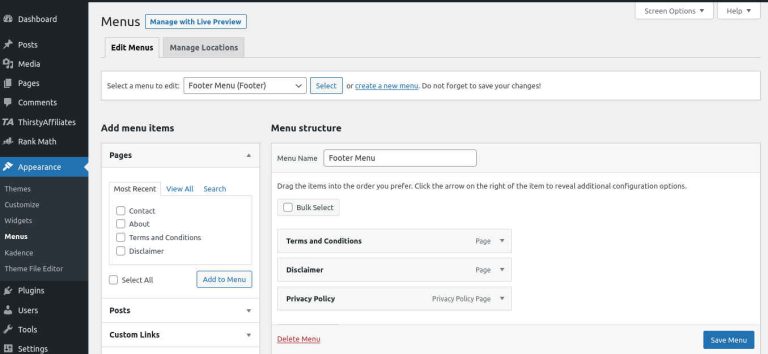
From the Menu pages, you can create a new menu, add pages to a menu, delete a menu, or specify where you want a menu to appear.
You can customize how your navigation menu looks from your GeneratePress theme.
#Step 8: Write Blog Posts
A post contains information that changes often. It differs from a page in several ways. It has a post author and date of publication. You can also add comments to a post.
Most of the content you write on your blog will be in posts.
To create a post, go to your WordPress dashboard then navigate to ‘Posts’, then ‘Add New’.

Wrapping Up
If you have successfully gone through the steps above, you should now have a fast, secure, and attractive website or blog.
However, setting up your blog is just the first part of your journey. You are now ready for the fun part where you:
- Write great content that your audience will love
- Get visitors to your site.
- Make money from your blog
See my article on Blogging as a Hobby for more on how to do blogging the right way.