How to Start a Profitable Teacher Blog (A Beginner’s Guide)

As a teacher, very few things can replace the joy of sharing your knowledge, skills, and experiences with others.
Everyday, you get to impact your students’ lives by equipping them with the knowledge and skills they need for success.
The fact that many successful people often credit their teachers for their success is testament to the important work you do.
However, your contribution to society can easily get lost in the day-to-day humdrum of modern teaching.
You can reawaken your love for teaching by tapping into other forms of teaching. And blogging will help you do that.
Blogging does this by helping you to shake things up, learn new skills, and explore new horizons.
In this article, I will:
- Explore why you need to start a teacher blog.
- Show you examples of successful teacher blogs.
- Take you step-by-step through the process of starting a teacher blog.
If this seems like something you might be interested in, stick around.
If you want to skip to the technical process of creating your blog, go to my quick-start guide to starting a blog.
Let’s dive in.
1. What Is a Teacher Blog?
A teacher blog is a blog that enables teachers to share their knowledge, experiences, and ideas.
There are several types of teacher blogs you can start, for example:
- An education blog. You create an education blog to facilitate teaching. For example, you can share exam revision questions, lesson plans and assignments. This kind of blog targets students.
- A teacher lifestyle blog. This blog is created to share teaching experiences with other teachers. You can post about teaching tips, courses for teachers, or job opportunities.
- A school blog. School blogs are used to share information about various school activities. You can post about upcoming events, changes at school, or student stories. This blog is primarily for the school community (students, teachers, administrators, and parents).
The kind of teacher blog you create will depend on your interests and needs.
Save Big On Web Hosting


Save Up to 70% by Hosting with ChemiCloud
2. Why Should You Start a Teacher Blog?
Although sitting down to blog after a busy day can seem like a chore, there are some good reasons why you may want to do it. The main benefits of starting a teacher blog are:
#1. You can use your blog to market yourself
If no one knows you, getting exciting opportunities can be difficult. You need to market your skills, knowledge, and abilities.
By writing high-quality, engaging, and informative articles, you can position yourself as an authority in your area of expertise. People will seek you out whenever they need help, and this can open up opportunities for collaborations, consultancies, or even higher-paying jobs.
#2. You can experiment with teaching
Traditional teaching can be a bit bureaucratic. Blogging can be a great way to experiment with innovative ways of teaching that would be difficult to implement in a traditional teaching environment.
With blogging, you can let your creativity bloom. This can help to alleviate a lot of the boredom that comes with doing the same thing every day. You will also make learning a much more enjoyable experience for your students.
#3. You can make extra income
Many teachers don’t get paid what they are worth. But why not give yourself a raise instead of waiting for your school or the government to do it?
Making an income online is not as complicated as it used to be, and blogging is probably the easiest way to get started.
You can use this extra income to save, treat yourself to something nice, or re-invest in your blog.
#4. You can reach a wider audience
Why limit your teaching to your school? If you are good at what you do and believe everyone should have access to quality education, then you should share your knowledge widely.
You can make a significant impact on an impoverished child’s life by simply putting your knowledge online.
These are just a few of the benefits of starting a blog. If you want to explore some more advantages of blogging, check out my article on the amazing benefits of starting a blog.
3. How Much Does It Cost to Start a Teacher Blog?
These days, you can start a blog with less than $75. You only need to pay for a domain name ($15 a year) and web hosting ($60 a year).
Some hosting companies even give you free a domain name and generous discounts that can bring the price of hosting to less than $50 a year (or less than $5 a month).
Besides hosting and domain registration, you can get by with free resources.
However, as you progress with your blogging and start earning some money, you can re-invest your profits to improve your blog.
4. Can You Make Money With a Teacher Blog?
Yes, you can. With a teacher blog, you can make anywhere from a few hundred dollars to thousands of dollars every month, depending on how much effort you put in. The more articles you write, the more money you can make.
How much you make from blogging will also depend on the focus of your blog. For example, making money with a school blog may be harder compared to a teacher lifestyle blog.
Teacher lifestyle or educational blogs have more opportunities for making money because you can:
- Offer coaching on skills like special education or classroom management.
- Offer products such as courses or books.
- Recommend products you like to others in exchange for an affiliate commission.
I talk about monetization opportunities later in the article.
If making money is your primary objective, consider expanding your teacher lifestyle blog to include other aspects of your life (such as personal finance or hobbies). This can help you attract an audience beyond the teaching community.
Some former teachers such as Melyssa Griffin and Lindsay Ostrom have even managed to build million dollar blogs by focusing on topics they enjoy (such as personal finance or food) (See my article on the highest-earning bloggers for their stories).
For a teacher, blogging is great because you can take advantage of long student holidays to work on your blog. This is a luxury that few other professions can provide.
And when you think about it, blogging is simply teaching in written form.
5. Examples of Successful Teacher Blogs
There are a couple of teacher blogs that are doing quite well. You can look at them to get ideas on how to structure and monetize your blog.
#1. Teacher Toolkit
The Teacher Toolkit blog was created by Ross Morrison McGill in 2007. Ross has been teaching since 1992 and has worked in various schools in the London area.
His blog has over 3,000 blog posts and hundreds of podcasts. His blog focuses on empowering teachers to be more effective in the classroom.
Ross monetizes his blog mainly by selling books and a subscription to his teacher toolkit. He also does teacher training.
#2. The Cool Cat Teacher Blog
The Cool Cat Teacher blog was started by Vicki Davis in 2005. Before starting her blog, she was a technology teacher and administrator for over 15 years.
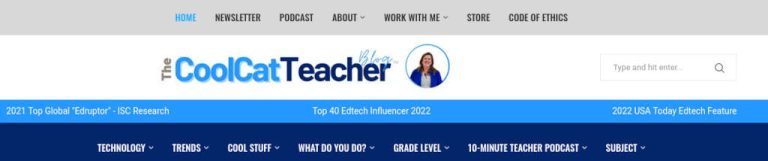
Her blog focuses on how to use technology in teaching and currently has over 5,000 blog posts. She has also branched out into podcasting.
She monetizes her blog through affiliate marketing and sponsorships.
#3. Teaching with a Mountain View
Teaching with a Mountain View was started in 2013 by Mary Montero. She was a 3rd and 4th Grade teacher in Colorado Springs (US) for over 14 years.
She uses her blog to help teachers to engage and inspire their students. She does this by providing learning resources and teaching tips.
She monetizes her blog mainly by selling digital downloads such as ebooks, printables, and cards.
6. What Can You Write About In a Teacher Blog? Teacher Blog Ideas
What you write about in your blog will depend on your audience. Is it other teachers, students, or school administrators?
If your target is students:
- You can design experiments that students can replicate at home.
- You can come up with innovative crafts that students can try.
- You can go through how to solve popular exam questions.
If your target is other teachers:
- You can write about how to deal with unruly students.
- You can give tips on how to apply for higher-paying teaching jobs.
- You can show new teachers how to make lesson plans.
If your target is school administrators
- You can give tips on how to fundraise for school projects.
- You can write about how to incorporate digital media in teaching.
- You can create a forum where school administrators can ask questions and get help from other administrators.
The ideas for a teacher blog are endless. If you analyze other successful blogs, you can get a feel for what to write.
7. Steps in Starting a Teacher Blog
Although starting a teacher blog may seem overwhelming, it is simple. In fact, you can do it in less than 30 minutes. And you don’t have to be a technical person. As long as you can use a computer, you can start a blog.
Note: In this section, I will give you a general overview of the steps you need to follow to start a teacher blog. If you need more detailed information on the technical aspects of starting a blog go to my quick start guide where I take you through the 8 main steps.
#Step 1: Decide what you want to write about
What do you want to write about? This is your niche.
To figure out your niche, ask yourself the following questions.
- What problems or needs do you want to solve?
- Who is your target audience? Is it other teachers, school administrators, or students?
- What products will you offer? This depends on your target audience. You can offer lesson plans, revision questions, etc.
- What is your current experience? For example, if you are a history teacher, you can write about history.
- What would you like to learn more about? You can view blogging as an excuse to research the things you enjoy and want to learn more about.
Examples of teacher blog niches include teaching tips, DIY & crafts, special education, tech in the classroom, adult education, digital learning, homeschooling, STEM, SAT, lab sessions, and class management.
For examples of what you can write in your blog, check out the teaching blog ideas in section 9.
#Step 2: Choose a name for your teacher’s blog
Your blog’s name represents your blog’s brand, therefore, you should put some thought into what you want your brand to portray.
Here are a few tips to consider when choosing a name for your blog.
- Choose a name that is available as a domain name. The domain name is the web address of your blog, for example, hobbyslave.com. Popular names will probably be unavailable, so you have to be creative. You can check whether your domain name is available when registering your domain name (see #Step 4).
- Choose a memorable name. You want a name that people can remember. It can be quirky (like coolcatteacher.com) or informative (like teachertoolkit.com).
- Avoid trademarked names. Avoid popular brand names or variations of brand names. You can be sued for trademark infringement and lose your blog.
- Check for the availability of the name on social media. You want a name that is available on major social media platforms (Facebook, YouTube, Instagram, and Twitter). This will help you to market your blog on these platforms.
Once you decide on your blog name, you can create a logo for your site. Your logo, blog name, and site colors are important aspects of your branding.
You can use a design tool like Visme to design beautiful logos. They have an easy-to-use logo maker that has eye-catching templates you can use.
#Step 3: Choose a blogging platform
There are plenty of blogging platforms you could use for your teacher blog. Some are specifically targeted towards educators (such as Edublogs) while others are free to start with (such as Medium and Blogger). Others like Wix and Squarespace have a free and paid option.
The main disadvantages of free blogging platforms are that they offer too few resources, and if you need to add features, you have to upgrade to expensive packages. Also, they tend to lock you in and may even use your site to promote themselves.
The Best Blogging Platform For A Teacher Blog
I recommend going with WordPress (WordPress.org, not WordPress.com). It is the most popular blogging platform and over 40% of all websites online use it. Why is it so popular?
- It is free. I mean truly free forever. Some platforms lure you with a free plan and you later have to upgrade to expensive plans when your blog’s traffic increases. With WordPress, all you need to pay for is web hosting with a provider of your choice.
- You will have control. Because WordPress is open-source, you have a lot of control over the plugins you can install, advertisers you can work with, or content you can write. You won’t wake up one day to find that someone has shut down your blog for one reason or another. Also, you don’t get locked in.
- It is easy to work with. There are plenty of tutorials, plugins, and themes that make the process of creating a blog a breeze.
For more on installing WordPress, see #Step 6.
#Step 4: Choose a web hosting provider
Your blog needs a place to live online. A web hosting provider will host your blog for you and provide services that will keep your blog online.
Choosing the right web host is crucial to the success of your blog. When starting out, it is best to start with shared hosting because it is cheap, affordable, and easy to use.
There are plenty of shared hosting web providers and it can overwhelming to choose between them, but here are a few good ones.
a) ChemiCloud
- Rating: They have a perfect 5 star rating on both Trustpilot and Hostadvice
- Pricing: Pro-plan. $4.79 (Discounted) $15.95 (Renewal). Check the current price.
- Features: Pro-plan. 30GB SSD, 350,000 inodes, 45- day money-back guarantee.
- Freebies: free domain, free website migration, free SSL, free CDN
ChemiCloud is my preferred web hosting company. It is quite affordable considering the features they offer. Their stand out feature is great customer support (24/7 by phone, email, and chat). This is crucial if you don’t have experience creating websites or blogs. They also have a 45-day guarantee.
Check out my step-by-step guide on how to start a blog on ChemiCloud.
b) Hostinger
- Rating: They have a 4.26 star rating on both Trustpilot and Hostadvice
- Pricing: Business Plan. $3.99 (Discounted) $8.99 (Renewal) Check the current price.
- Features: Pro-plan. 200GB SSD, 600,000 inodes, 30-day money-back guarantee.
- Freebies: free domain, free website migration, free SSL
Hostinger is great value for money and the cheapest of the three. However, they have no phone support (only LiveChat).
c) Bluehost
- Rating: They have a 4.2 star rating on Trustpilot and 2.8 Stars on Hostadvice
- Pricing: Choice-Plus Plan. $5.45 (Discounted) $19.99 (Renewal). Check the current price.
- Features: Choice-Plus Plan. 40GB SSD, 50,000 inodes, 30-day money-back guarantee.
- Freebies: free domain, free SSL
Bluehost is pricier than the rest but it is a big brand and has been in the hosting business for many years. Their low inode allocation, however, could be a problem if you plan to upload a lot of content.
#Step 5: Register Your Domain Name and Sign Up for Hosting
Once you pick your web hosting company, you will need to:
- Select your preferred hosting package.
- Check if domain name you want is available for purchase.
- Filling in your account details including your contact details.
- Select the data center where you want your blog to be hosted.
- Select any other extras you might need (such as privacy protection).
- Purchase the hosting service.
#Step 6: Install WordPress and WordPress Plugins
Once you have purchased your hosting, the hosting company will email your login details and a link to where you can log in.
If you are using a shared hosting company that has cPanel, you can install WordPress in one click using the Softaculous installer.
After you install WordPress, you need to:
- Configure WordPress by deleting unwanted themes and plugins, configuring the permalink structure, and doing any required updates.
- Install important plugins. Plugins you may require include: an optimization plugin, a security plugin, and a backup plugin. See the most important plugins for a new blog.
- Create important pages like the home, blog, about, contact, and legal pages (such as disclaimer, privacy policy, and terms).
- Create a navigation bar to help your visitors find important pages.
- Install an SSL certificate. This helps to encrypt your visitors’ data to secure it from hackers. Some shared hosting companies allow you to install Let’s Encrypt SSL for free with a few clicks.
Check out this short video (7 minutes) on how to configure WordPress.
#Step 7: Design Your Site
Once you have installed WordPress, it is time to design your blog and make it look pretty.
Your design should reflect the tone of your blog (e.g. formal or informal). In general, ensure that your blog looks professional and appealing.
You can design the blog yourself by installing a WordPress theme and a design plugin.
GeneratePress has one of the best themes around. It is fast, reliable, easy to use, and SEO optimized. You will need to install the GeneratePress theme.
The premium version of GeneratePress costs around $59 a year and is packed full of features. You can use it to design anything from an online store to a membership site (check for the current price and features).
They also have a free version that is quite sufficient if you don’t need any complicated features.
There are also plenty of great tutorials on YouTube on how to use GeneratePress, such as this one.
#Step 8: Create your first post
Once your blog is up and running, then it is time to create content.
You will write most of your content as blog posts. To create a blog post from your WordPress dashboard, go to Posts and then New Post.

That was a brief overview of the steps you need to create a blog. If you have made it to this step, then you should now have a functional blog. If you get stuck during the process or you need more details on the technical aspects, check out my quickstart guide on setting up a blog.
8. Next Steps After Setting Up Your Teacher Blog
Once you have finished setting up your blog, there are several things you can do to ensure that your blog is successful.
- Optimize your blog for speed. If you have used a good web hosting company and a good theme, then your blog will be pretty fast. But you can make it even faster by using a WordPress optimization plugin like WP Rocket.
- Focus on SEO. Learn all you can about Google SEO as this will help your articles to get ranked. Learn how to identify keywords with decent volume and low competition using a keyword tool like KW Finder.
- Create content consistently. Write engaging, high-quality content consistently. Aim for 2-3 posts per week. If you are a slow writer, hire writers in places like Upwork or Fiverr. Alternatively, you can use an AI writer like Writesonic.
- Make your content easy to read. You can do this by fixing grammatical errors, and breaking up walls of text with images and sub-headings.
- Get visitors to your post. You can do this by using SEO techniques, building an email list, promoting on social media, or using YouTube.
- Think about monetization early. Learn how to monetize your site and experiment with different monetization methods, such as display ads, affiliate marketing, providing services, and selling digital products. You can look at Teachers Pay Teachers to see what other teachers are selling.
For more, you can check out my article on the best blogging advice for beginner bloggers.
Wrapping Up
There you go! You now have everything you need to create an awesome teacher blog. So, start your blog today.
Don’t procrastinate. Three years from now, your blog could be earning you a healthy side income even as you make a positive impact on others.
Also, be patient. With blogging, it can sometimes feel like you are spinning your wheels and getting nowhere, especially at the beginning. However, if you keep cranking out good content and learning all you can about blogging, you will see results.
What to read next
You may also enjoy reading the following articles: